


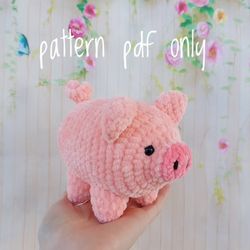
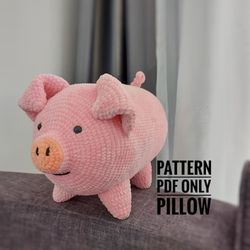
Pig crochet pattern,Piggy Amigurmi pattern Pdf
$1.99
& Instant Download
Payment Methods:
About this item
Piggy Crochet Pattern: A Fun and Easy DIY Project for Beginners
Are you looking for a fun and easy DIY project to try out this weekend? Look no further than the Piggy Crochet Pattern! This adorable little piggy is the perfect project for beginners, with easy-to-follow instructions and simple stitches. In this article, we will walk you through the steps to create your very own piggy crochet, from selecting the right materials to finishing off with cute details.
Materials Needed
Before starting your piggy crochet, make sure you have all the necessary materials on hand. Here's what you'll need:
- Worsted weight yarn in pink and white
- Crochet hook (size G)
- Yarn needle
- Fiberfill stuffing
- Scissors
- Stitch marker (optional)
Step-by-Step Instructions
- Start by creating the piggy's body. Using the pink yarn, create a magic circle and make six single crochet (sc) stitches in the circle. Pull the tail to close the circle.
- Increase each stitch around the circle by making two single crochet (sc) stitches in each stitch. Use a stitch marker to keep track of the beginning of the round. You should end up with 12 stitches.
- Repeat step 2 in the next round, increasing each stitch by two sc. This time, you should have 24 stitches.
- In the next round, make one sc in each stitch. Repeat this round four more times, for a total of six rounds of 24 stitches.
- In the next round, decrease each stitch by making one sc in the next stitch, followed by a sc decrease in the next two stitches. Repeat this pattern around the circle until you have 18 stitches.
- Stuff the piggy's body with fiberfill stuffing, making sure to firmly pack it in.
- Continue decreasing each stitch in the next three rounds, until you have six stitches left. Cut the yarn and tie off, leaving a long tail for sewing.
Creating the Head and Ears
- To create the piggy's head, use the white yarn to make a magic circle and six single crochet (sc) stitches in the circle. Pull the tail to close the circle.
- Increase each stitch around the circle by making two single crochet (sc) stitches in each stitch. You should end up with 12 stitches.
- Repeat step 2 in the next round, increasing each stitch by two sc. This time, you should have 24 stitches.
- In the next round, make one sc in each stitch. Repeat this round three more times, for a total of four rounds of 24 stitches.
- In the next round, decrease each stitch by making one sc in the next stitch, followed by a sc decrease in the next two stitches. Repeat this pattern around the circle until you have 18 stitches.
- Stuff the piggy's head with fiberfill stuffing, making sure to firmly pack it in.
- Continue decreasing each stitch in the next two rounds, until you have six stitches left. Cut the yarn and tie off, leaving a long tail for sewing.
- To create the piggy's ears, use the white yarn to make two circles of six single crochet (sc) stitches each. Pull the tail to close each circle.
- Stuff the ears with fiberfill stuffing and sew them onto the top of the piggy's head.
Similar Products


Free Shipping
24/7 Live Chat
Secure Payments